 Pin It
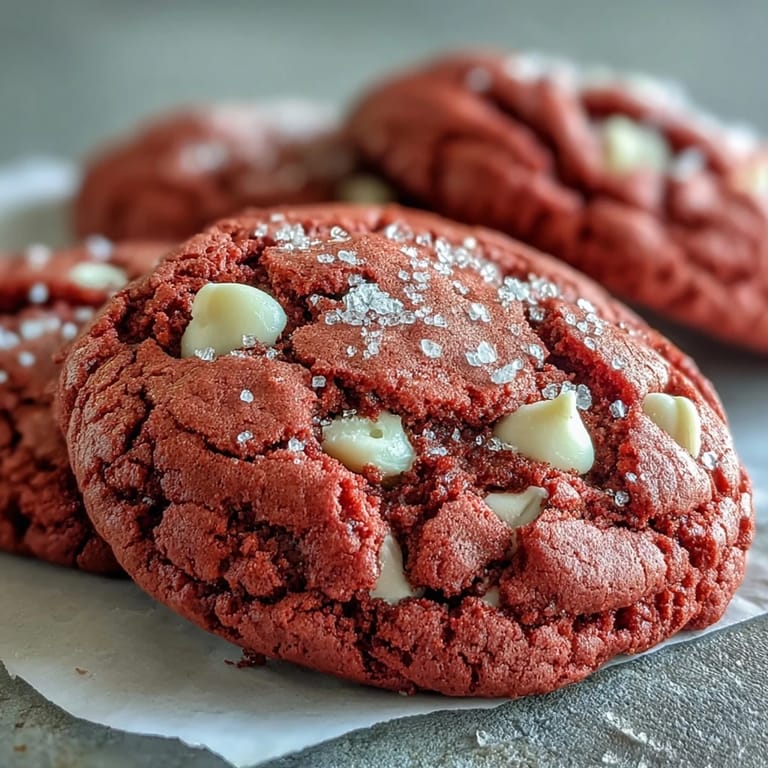
 My neighbor knocked on my door one Saturday morning with a container of these shockingly pink cookies, and I honestly thought they were store-bought until I tasted one. The texture was so soft it practically melted, and those pockets of white chocolate made me close my eyes and sigh. She laughed at my reaction and promised to share the recipe, which I made that very afternoon. Now I bake them whenever I need something that tastes as good as it looks.
I brought these to a potluck once, stacked in a clear glass jar, and they were gone before the main course even hit the table. A little girl asked if they were strawberry flavored, and when I said no, just vanilla, she looked so confused but kept eating anyway. Her mom took a photo of the jar and texted me later asking for the recipe. That was the moment I realized these cookies had a kind of magic that went beyond flavor.
Ingredients
- All-purpose flour: This gives the cookies their tender structure, and I always spoon it into the measuring cup rather than scooping directly to avoid dense, heavy cookies.
- Baking powder and baking soda: The combination creates just the right amount of lift and chew without making them cakey, which took me a few tries to get right.
- Salt: A small amount balances the sweetness and makes the white chocolate taste even richer.
- Unsalted butter: I let mine sit on the counter for about an hour until it leaves a slight indent when pressed, which makes creaming so much easier.
- Granulated sugar: This is what gives the cookies their crisp edges and soft centers, and I never skimp on the creaming time.
- Egg: One large egg binds everything together and adds moisture, so make sure it is at room temperature for the smoothest dough.
- Vanilla extract: I use pure vanilla because the flavor really shines in these simple cookies, and it pairs beautifully with the white chocolate.
- Pink gel food coloring: Gel is key here because liquid coloring can throw off the dough consistency, and you only need a tiny bit to get that gorgeous hue.
- White chocolate chips: I use good quality chips that melt into creamy pockets, and sometimes I chop a bar instead for bigger chunks.
Tired of Takeout? 🥡
Get 10 meals you can make faster than delivery arrives. Seriously.
One email. No spam. Unsubscribe anytime.
Instructions
- Whisk the dry ingredients:
- Combine the flour, baking powder, baking soda, and salt in a medium bowl and whisk until evenly distributed. This step prevents clumps and ensures every cookie bakes consistently.
- Cream the butter and sugar:
- Beat the softened butter and sugar together until the mixture turns pale and fluffy, which takes about two to three minutes. This creates air pockets that make the cookies tender.
- Add the egg and flavorings:
- Mix in the egg and vanilla until smooth, then add the pink gel food coloring and beat until the color is even and vibrant. The dough will look almost neon at first, but it mellows slightly as it bakes.
- Combine wet and dry:
- Add the dry ingredients gradually to the wet mixture, mixing on low speed just until no flour streaks remain. Overmixing here will make the cookies tough, so stop as soon as it comes together.
- Fold in the chips:
- Use a spatula to gently fold in the white chocolate chips, making sure they are evenly distributed. I like to save a few to press on top of each dough ball before baking.
- Chill the dough:
- Cover the bowl with plastic wrap and refrigerate for thirty minutes, which helps the cookies hold their shape and prevents them from spreading too thin. I use this time to clean up and preheat the oven.
- Prep and scoop:
- Preheat your oven to 350 degrees Fahrenheit and line two baking sheets with parchment paper. Scoop tablespoon-sized balls of dough and space them two inches apart.
- Bake until just set:
- Bake for ten to twelve minutes, watching for set edges and soft centers. They will look slightly underbaked, but they firm up as they cool and stay wonderfully chewy.
- Cool and enjoy:
- Let the cookies rest on the baking sheet for five minutes to finish setting, then transfer them to a wire rack. They are perfect warm or at room temperature.
 Pin It
 My daughter asked to bring these to her school bake sale, and when I picked her up that afternoon, she told me they sold out in the first fifteen minutes. A few parents even asked if I took orders, which made me laugh. But honestly, watching her beam with pride made me realize these cookies are more than just a treat, they are little moments of joy we get to share.
Storing Your Cookies
I keep these in an airtight container on the counter, and they stay soft and chewy for up to a week. If you want to freeze them, layer the baked and cooled cookies between sheets of parchment paper in a freezer-safe container, and they will keep for up to three months. I have also frozen the dough in scooped balls, which means I can bake just a few cookies whenever I want without making a whole batch.
Flavor Variations
Sometimes I add half a teaspoon of almond extract along with the vanilla, which gives the cookies a subtle bakery-style flavor that people always ask about. A friend of mine swirled in a few drops of rose water once, and it turned them into something fancy enough for a bridal shower. You can also swap the white chocolate for dark chocolate chips if you want a less sweet version, though I love the contrast of the creamy white chips against the pink dough.
Serving Suggestions
These cookies are stunning on their own, but I have sandwiched them with cream cheese frosting for birthday parties and they disappeared faster than cake. You can also crumble them over vanilla ice cream or pack them in clear bags tied with ribbon for gifts. They photograph beautifully, so if you are bringing them to an event, expect people to take pictures before they take bites.
- Press a few extra white chocolate chips on top of each dough ball before baking for a bakery-style look.
- Dust the cooled cookies lightly with powdered sugar for an elegant finish.
- Serve them with cold milk, hot coffee, or even champagne at a celebration.
 Pin It
 Every time I pull a batch of these from the oven, the kitchen smells like vanilla and happiness, and I am reminded that some recipes are worth making over and over. I hope these cookies bring as much joy to your table as they have brought to mine.
Recipe FAQs
- → Why do pink velvet cookies need to be chilled?
Chilling the dough for 30 minutes prevents the cookies from spreading too much in the oven, helping them maintain a thick, soft texture and hold their shape during baking.
- → Can I use liquid food coloring instead of gel?
Gel food coloring works best because it provides vibrant color without adding excess liquid to the dough. Liquid coloring can alter the texture and may require additional flour to compensate.
- → How do I know when the cookies are done baking?
The cookies are ready when the edges are set but the centers still look slightly underbaked. They will continue to firm up as they cool on the baking sheet, resulting in the perfect soft and chewy texture.
- → Can I freeze the dough or baked cookies?
Yes, you can freeze scooped dough balls for up to 3 months—bake from frozen adding 1-2 minutes to the baking time. Baked cookies can also be frozen in an airtight container for up to 3 months.
- → What variations can I make to these cookies?
Try adding almond extract or rose water for flavor depth, use dark chocolate chips instead of white, or fill cooled cookies with cream cheese frosting to make sandwich cookies. For gluten-free needs, use a 1:1 gluten-free flour blend.
- → How should I store pink velvet cookies?
Store cooled cookies in an airtight container at room temperature for up to 1 week. Place parchment paper between layers to prevent sticking and maintain their soft texture.