 Pin It
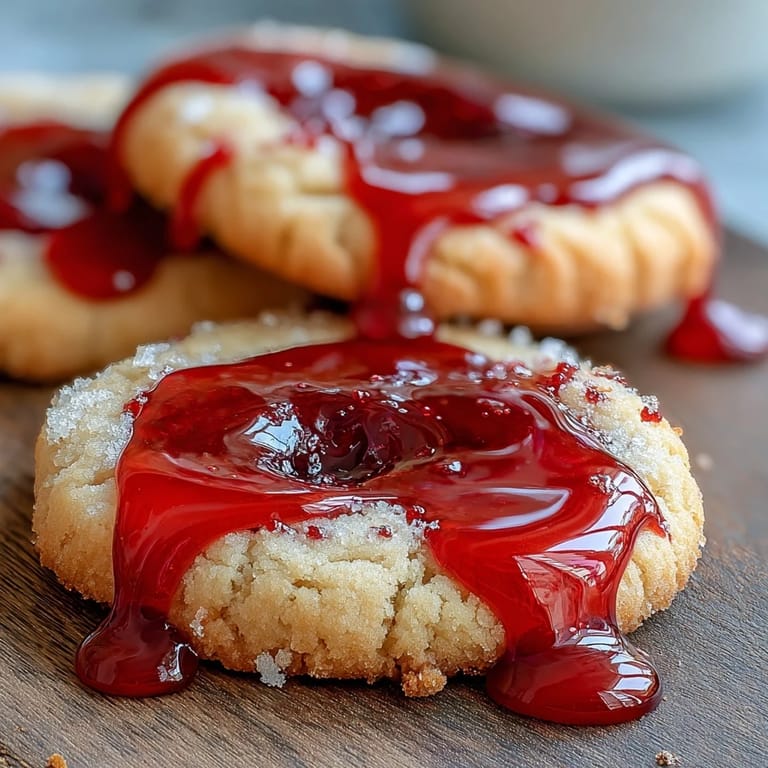
 When Halloween arrives, there's nothing quite like a batch of sugar cookies that look as spooky as they taste delicious. These Vampire Bite Sugar Cookies combine the classic comfort of soft, buttery sugar cookies with a theatrical twist—dramatic vampire bite marks filled with glossy red icing that drips down like fresh blood. They're the perfect centerpiece for your Halloween dessert table, delighting both kids and adults with their eerie appearance and irresistible flavor. Whether you're hosting a costume party or simply want to add some festive flair to your autumn baking, these cookies deliver both visual impact and satisfying sweetness in every bite.
Pin It The beauty of these cookies lies in their simplicity. The base is a classic sugar cookie recipe—nothing fancy, just pure buttery goodness—but the presentation transforms them into something truly memorable. The technique of poking bite marks with a straw or chopstick is incredibly easy, yet the effect is startlingly realistic. When you fill those marks with glossy red icing and let it drip naturally down the sides, you create an edible work of art that captures the essence of Halloween without requiring any advanced decorating skills.
Ingredients
Tired of Takeout? 🥡
Get 10 meals you can make faster than delivery arrives. Seriously.
One email. No spam. Unsubscribe anytime.
- For the Sugar Cookies: 2 1/4 cups (280 g) all-purpose flour, 1/2 tsp baking powder, 1/4 tsp salt, 3/4 cup (170 g) unsalted butter (softened), 1 cup (200 g) granulated sugar, 1 large egg, 1 1/2 tsp pure vanilla extract
- For the Red Blood Icing: 1 cup (120 g) powdered sugar (sifted), 2–3 tsp milk, 1/2 tsp light corn syrup (for shine), red gel food coloring
- For Decoration: Black or dark red gel icing (optional, for detail)
Instructions
- Step 1: Prepare Your Workspace
- Preheat oven to 350°F (175°C). Line two baking sheets with parchment paper.
- Step 2: Mix Dry Ingredients
- In a medium bowl, whisk together flour, baking powder, and salt. Set aside.
- Step 3: Cream Butter and Sugar
- In a large bowl, beat butter and granulated sugar until light and fluffy (about 2 minutes).
- Step 4: Add Wet Ingredients
- Add egg and vanilla, mixing until combined.
- Step 5: Form the Dough
- Gradually add the flour mixture, beating on low until a soft dough forms.
- Step 6: Shape the Cookies
- Scoop tablespoon-sized portions, roll into balls, and place 2 inches apart on prepared sheets. Flatten slightly with your palm.
- Step 7: Bake
- Bake for 10–12 minutes, or until edges are just golden. Cool on baking sheets for 5 minutes, then transfer to a wire rack to cool completely.
- Step 8: Create Bite Marks
- Use a straw or the end of a chopstick to gently poke two bite marks near the edge of each cooled cookie.
- Step 9: Make the Red Icing
- In a small bowl, mix powdered sugar, milk (adding a little at a time), corn syrup, and red food coloring until a thick but pipeable consistency is reached.
- Step 10: Apply Blood Effect
- Using a toothpick or small piping bag, fill the bite marks with red icing, letting it drip slightly for a bloody effect. Optionally, pipe a small trail of red icing from the bites.
- Step 11: Add Final Details
- Add detail with black or dark red gel icing if desired. Let icing set before serving.
Zusatztipps für die Zubereitung
For the best results, make sure your butter is properly softened to room temperature before beginning—this ensures it creams smoothly with the sugar and creates that light, fluffy texture. If your kitchen is particularly warm, chill the dough for 30 minutes before shaping to prevent spreading during baking. When creating the bite marks, wait until the cookies are completely cool to avoid crumbling. For the red icing, start with less milk and add gradually—it's easier to thin icing than to thicken it. The corn syrup is key to achieving that glossy, wet-looking blood effect, so don't skip it.
Varianten und Anpassungen
These cookies are wonderfully adaptable to different tastes and dietary needs. For an almond-flavored variation, add 1/4 tsp almond extract along with the vanilla for a subtle nutty note. If you need a gluten-free version, substitute the all-purpose flour with a 1:1 gluten-free baking blend. For a more intense red color, use gel food coloring rather than liquid, as it won't thin the icing. You can also experiment with different icing colors—purple for zombie wounds or green for radioactive bites. Some bakers like to add a touch of peppermint extract to the icing for a minty twist that pairs beautifully with chocolate drinks.
Serviervorschläge
These vampire bite cookies are best served on a dark plate or platter to enhance their spooky appearance. Arrange them on a serving tray with fake spider webs, plastic spiders, or Halloween-themed napkins for maximum impact. They pair wonderfully with hot chocolate topped with marshmallows, making them perfect for an autumn afternoon treat. For adult gatherings, serve alongside mulled wine or spiced cider for a cozy Halloween experience. Store cookies in an airtight container at room temperature for up to 5 days, though the icing is most glossy within the first 24 hours. These also make fantastic party favors—wrap individual cookies in clear cellophane bags tied with orange and black ribbon.
 Pin It
 These Vampire Bite Sugar Cookies prove that impressive Halloween treats don't require hours of complicated work. With a simple sugar cookie base, a bit of creative poking, and some strategically applied red icing, you can create desserts that look like they came from a professional bakery. They're conversation starters, photo opportunities, and most importantly, absolutely delicious. Whether you're a seasoned baker or trying your hand at themed cookies for the first time, this recipe delivers results that will have everyone asking for seconds—and the recipe. So gather your ingredients, embrace your inner vampire, and get ready to sink your teeth into the most fun baking project of the season.