 Pin It
 I discovered the magic of checkerboard appetizers at a summer garden party where my neighbor brought a platter that stopped everyone mid-conversation. The visual pattern was so striking that guests couldn't resist reaching for one, and before I knew it, the board was empty. That's when I realized that sometimes the most memorable dishes aren't about complexity—they're about thoughtful presentation that makes people smile the moment they see it. I've been making these ever since, and they've become my secret weapon for bringing a little unexpected joy to any gathering.
I'll never forget making these for my daughter's outdoor birthday party. She stood next to the platter and watched people's faces light up when they saw the checkerboard pattern. Watching her proudly tell her friends that her mom made them from scratch (even though it took barely twenty minutes) reminded me that presentation and intention matter just as much as the ingredients themselves.
Ingredients
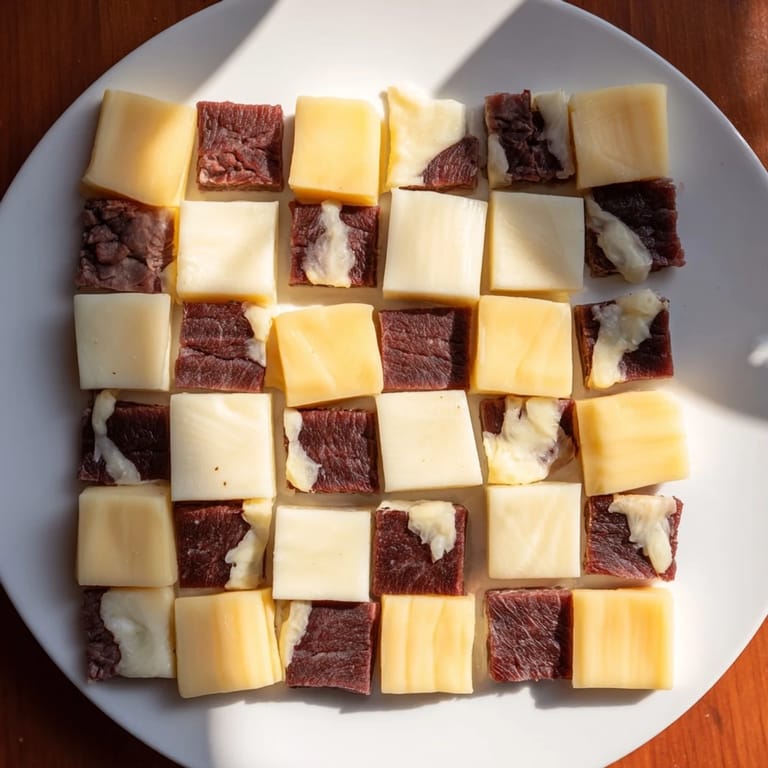
- Smoked turkey breast: 8 slices cut into 1-inch squares. The turkey provides a lean, mild backdrop that lets the cheese shine without overwhelming the palate. I learned to buy it from the deli counter rather than pre-packaged because it has better texture and you can ask them to slice it to your preferred thickness.
- Roast beef: 8 slices cut into 1-inch squares. This brings a deeper, richer flavor that contrasts beautifully with the lighter turkey. Choose a good quality roast beef—it's the star of your darker squares, so it deserves a moment of consideration.
- Swiss cheese: 8 slices cut into 1-inch squares. The subtle nuttiness and those characteristic holes make Swiss the perfect pairing with roast beef. I always buy block Swiss and slice it myself because the texture stays better than pre-sliced.
- Sharp cheddar cheese: 8 slices cut into 1-inch squares. The sharpness cuts through the richness of the turkey and adds a bright, assertive note. This is where your checkerboard gets its personality, so choose a cheddar you actually enjoy eating on its own.
- Fresh chives: finely chopped for garnish. They add a whisper of onion flavor and a pop of green that makes the whole platter feel more intentional and finished.
- Cracked black pepper: a few pinches for garnish. Just a grind or two elevates the entire presentation and reminds people that even simple things deserve a final seasoning.
Tired of Takeout? 🥡
Get 10 meals you can make faster than delivery arrives. Seriously.
One email. No spam. Unsubscribe anytime.
Instructions
- Prepare your canvas:
- Lay out your parchment paper or serving board on a clean counter. Take a moment to imagine your finished checkerboard—this mental picture will guide your hands and keep you focused on the pattern. The right surface matters because these delicate squares will slide around on anything too slick, but parchment gives you just enough grip.
- Cut with intention:
- Slice your meats and cheeses into 1-inch squares using a sharp knife. Listen for that clean cutting sound—it tells you your knife is doing the job right. Keep the squares roughly uniform; they don't have to be perfect, but consistency makes the checkerboard feel intentional rather than scattered. I like to lay them out on the cutting board in their ingredient groups first, organized like little armies waiting for deployment.
- Build your pattern:
- Starting in the top left corner of your board, begin laying down your alternating squares. Turkey, cheddar, turkey, cheddar across the top row. Then roast beef, Swiss, roast beef, Swiss in the second row. Continue alternating the rows until you have your complete 4x4 grid. Step back often—really look at it. Your hands know what a checkerboard should look like, and they'll guide you if you trust them.
- Make them stick:
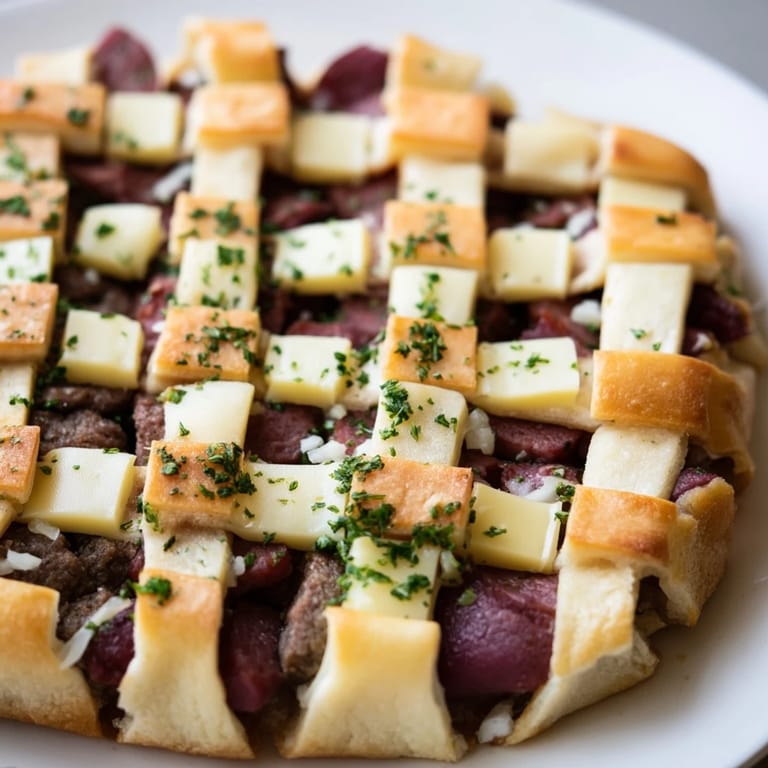
- Once your pattern is complete, gently press adjacent squares together. If you're serving immediately, just the slight pressure of stacking works fine. But if you're transporting this to a picnic or party, a tiny dab of honey or whole grain mustard under each square acts like an edible glue. Just a fingertip-sized amount per square—you want adhesion, not a condiment experience.
- Add the finishing touches:
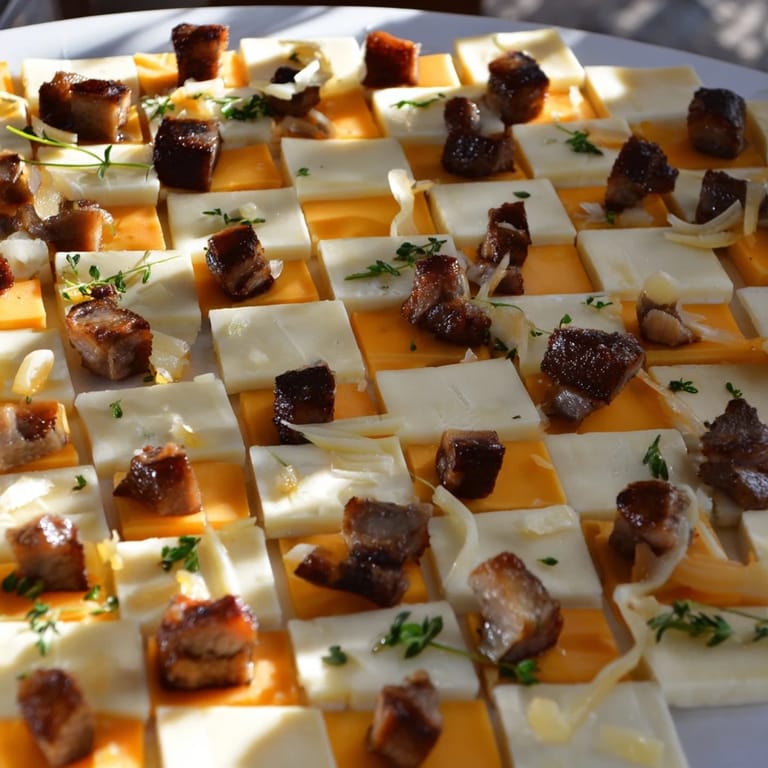
- Sprinkle your finely chopped chives across the entire checkerboard in a light, even rain. Then add a few cracks of black pepper. These garnishes aren't just decoration; they signal to your guests that you've thought about every detail. The green and black dots transform the platter from simple arrangement to composed dish.
- Serve with confidence:
- Whether you're serving this chilled from the refrigerator or at room temperature, bring it out with pride. The beauty of this platter is that it speaks for itself—no explanation needed, just admiration.
 Pin It
 One evening, I made this for a small dinner party where a guest mentioned she'd given up hosting because she felt overwhelmed by complicated recipes. Watching her face as I showed her how simple these actually were—how you could make them while your coffee brewed—felt like giving her permission to entertain again. That's when I understood: these checkerboard bites aren't just an appetizer, they're proof that beautiful food doesn't require hours or culinary school.
The Power of Simple Elegance
There's a philosophy in cooking that often gets buried under recipe complexity: sometimes the most sophisticated dishes are the simplest ones. These checkerboard bites embody that truth. You're not relying on technique or timing—you're relying on contrast, color, and clarity of vision. The dark and light squares don't just look good together; they represent how flavors work in harmony. Every element has a reason, and there's nothing hiding or pretending to be something it's not. This is cooking at its most honest and most beautiful.
Variations That Keep It Interesting
Once you understand the checkerboard principle, you start seeing possibilities everywhere. I've made versions with prosciutto and fresh mozzarella that felt almost Italian, others with salami and Havarti that leaned into Scandinavian flavors. For vegetarian friends, roasted beets and crisp cucumber slices create stunning contrast. The pattern is just a framework—the ingredients are your expression. One thing I learned is that the rule of opposites applies: if one ingredient is soft, make the other firm. If one is salty, balance it with something mild. The checkerboard isn't just visual; it's a map of how flavors should dance together on the palate.
Hosting Wisdom from These Simple Bites
Making these appetizers taught me something I now apply to all my entertaining: guests remember how a platter made them feel more than how much time you spent on it. A thoughtfully composed board of simple ingredients beats a complicated dish made with stress and rushed energy. These bites also taught me the value of working within constraints. Four ingredients, a simple grid—that limitation forced creativity and clarity. I started considering what else in my cooking could benefit from this same approach: fewer elements, more intention, better execution.
- Serve with toothpicks placed artfully around the platter so guests know they're meant to be picked up and enjoyed casually
- Pair these with sparkling wine, crisp lemonade, or iced tea—beverages that refresh between bites rather than weigh you down
- Make extras and refrigerate them; they actually taste better after a few hours when the flavors have mingled and melded slightly together
 Pin It
 These checkerboard bites have become my favorite reminder that hospitality isn't about complexity—it's about attention. The kind of attention that notices how cheese and meat can tell a visual story, that understands a clean cut matters, that knows guests feel genuinely welcomed when you've thought about every detail, even the small ones.
Recipe FAQs
- → What meats work best for these bites?
Smoked turkey breast and roast beef provide contrasting flavors and colors that complement the cheeses well.
- → Can I make these vegetarian?
Yes, substitute the meats with colorful vegetables like roasted beet and cucumber slices for a fresh alternative.
- → How should I arrange the squares for best effect?
Create a neat 4x4 grid alternating meat and cheese squares to achieve the classic checkerboard pattern.
- → Is any adhesive needed to keep the squares together?
A small dab of honey or mustard under each square can help them stick, especially if transporting.
- → What garnishes enhance the bites?
Chopped fresh chives and cracked black pepper add a subtle, flavorful finish.
- → How should these bites be served?
Serve chilled or at room temperature, perfect for easy handling with toothpicks on picnic or party platters.