 Pin It
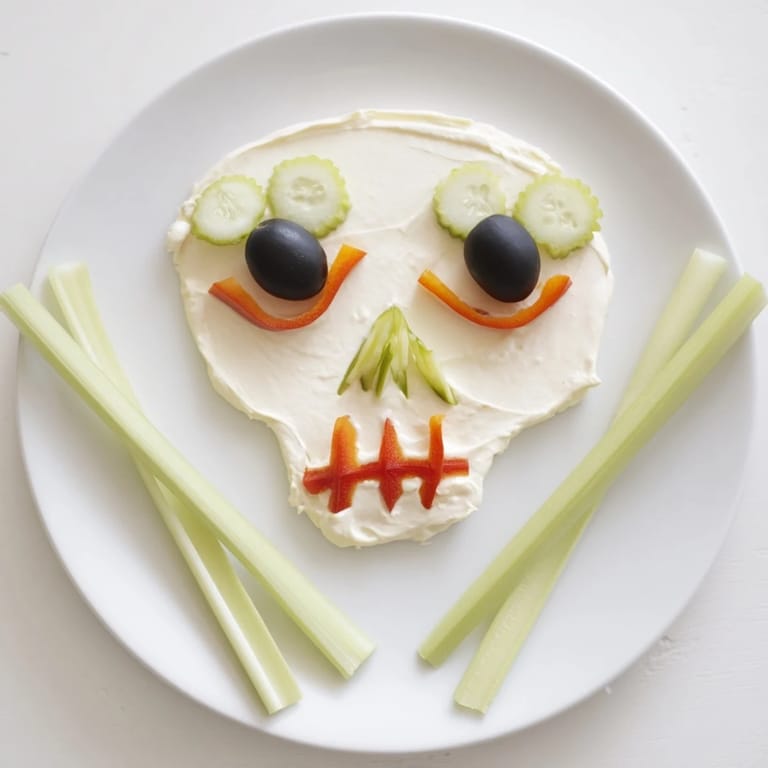
 I'll never forget the Halloween party where I frantically assembled this Skull & Bones spread minutes before guests arrived. My eight-year-old niece had begged me to make something "spooky but not actually gross," and as I shaped that creamy mixture into a skull on my favorite blue platter, I realized I'd created something that felt both genuinely festive and surprisingly simple. Now it's become the appetizer that gets requested every October, the one that makes kids and adults alike lean in with genuine delight before diving in with their crackers and vegetables.
There was this moment at my neighborhood costume party when someone's kid dressed as a vampire took one look at this skull spread and shouted "It's not real!" with genuine relief. Her mother laughed and said it was the first Halloween food her daughter would actually eat, and suddenly this simple appetizer became something meaningful—proof that festive doesn't have to mean complicated.
Ingredients
- Cream cheese, softened (225 g or 8 oz): This is your foundation, so make sure it's genuinely soft before mixing—hard cream cheese creates lumps that won't spread smoothly. I always pull mine out about thirty minutes before I start cooking.
- Sour cream (2 tbsp): This adds a subtle tang and keeps the spread creamy without being heavy. It's the secret to why this tastes more sophisticated than you'd expect.
- Garlic powder (1 tsp): Just enough to make people pause and ask what's in it. You could fresh mince garlic if you prefer, but the powder distributes more evenly.
- Lemon juice (1 tsp): A single teaspoon brightens everything. It's barely noticeable as lemon, but without it, the spread feels flat.
- Salt and pepper to taste: Season as you go—you might need more or less depending on your cream cheese brand.
- Cucumber, sliced into rounds (1 small): These become gentle, pale green scales that frame the skull beautifully.
- Red bell pepper, cut into thin strips (1): The color contrast is stunning, and the thin strips curve perfectly into a mouth.
- Black olives, halved (2 large): These are your eyes—oddly expressive for something so simple.
- Carrot, sliced and shaped (1 small): Rounds become teeth, thin pieces work as a nose. Carrots are sturdier than you'd think when you slice them right.
- Celery sticks or breadsticks (2–4 long): These crossbones are the punchline of the whole arrangement. The celery stays fresher and crispier throughout the party.
- Fresh parsley or chives (optional): A small garnish that transforms this from cute to restaurant-quality looking.
Tired of Takeout? 🥡
Get 10 meals you can make faster than delivery arrives. Seriously.
One email. No spam. Unsubscribe anytime.
Instructions
- Create Your Base:
- In a medium bowl, combine your softened cream cheese with the sour cream, garlic powder, lemon juice, salt, and pepper. Mix slowly at first, then once everything's incorporated, beat it for a full minute until it's genuinely fluffy—this makes spreading so much easier. Taste it and adjust the seasonings. This is your moment to get it right before it all comes together.
- Shape the Skull:
- Pour your spread onto your largest serving platter and use a spatula or the back of a spoon to shape it into an oval skull. Don't stress about perfection—skulls aren't symmetrical in real life anyway. Smooth the top and sides as much as you can, working from the center outward. This is meditative work, honestly.
- Add the Crossbones:
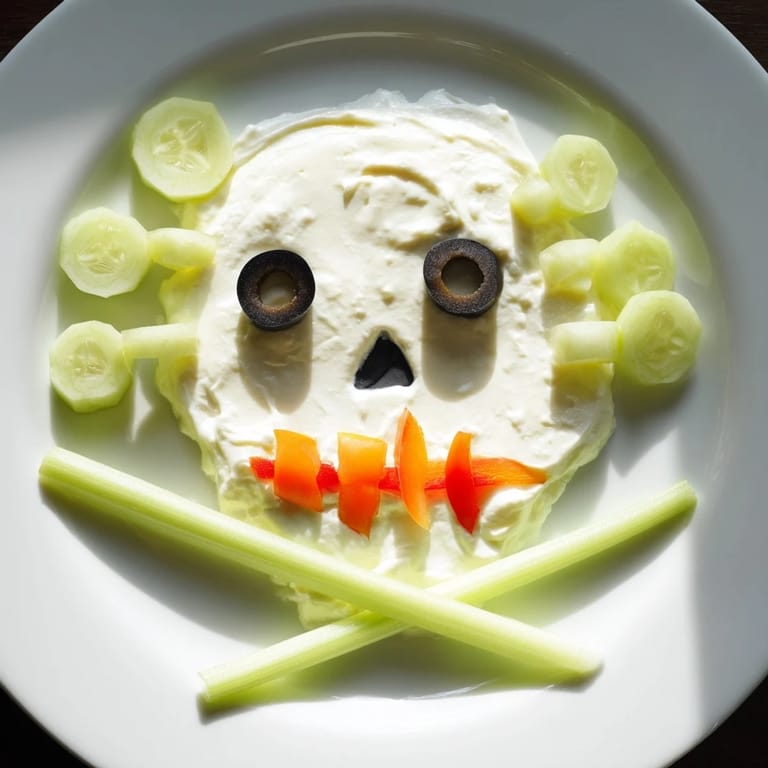
- Take your celery sticks or breadsticks and arrange them crossing beneath the bottom of your skull shape, creating an X. They should tilt slightly toward each other, like actual bones would rest. This is the moment it starts to feel Halloween-special.
- Place the Eyes:
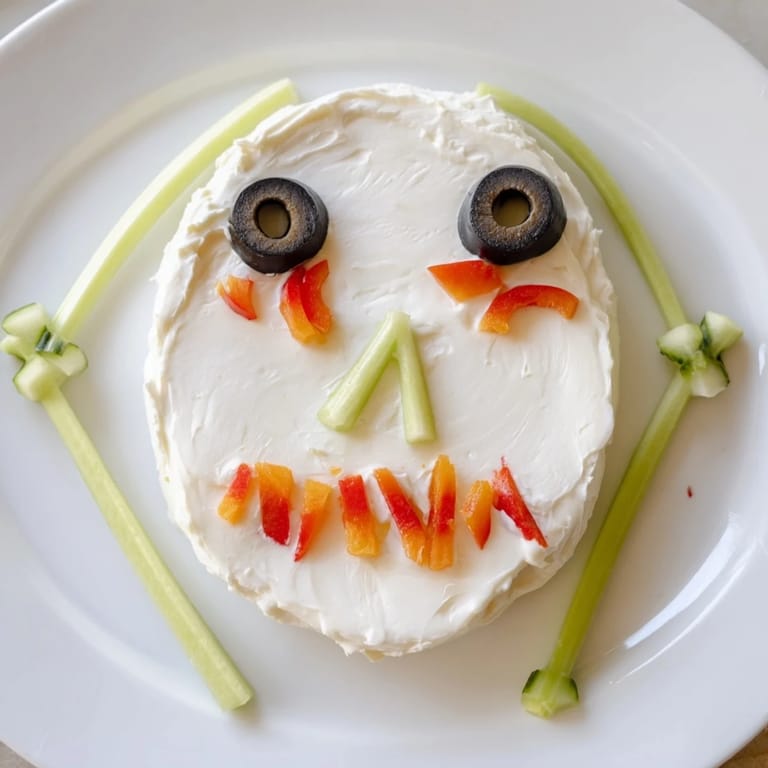
- Press the black olive halves gently into the top of the skull where eyes would be. You're not buried them—just nestled them into the spread so they sit naturally.
- Build the Face:
- Take a thin carrot slice for the nose and position it in the center of the skull, between the eyes. Now comes the fun part: arrange your red bell pepper strips into a mouth shape below the nose. Use carrot rounds along the bottom for teeth, pressing them slightly into the spread so they stay put. Step back. Does it look like a skull? Good. If not, you can adjust.
- Finish with Details:
- Fill in any gaps with additional cucumber slices, creating a mosaic effect that's both decorative and functional. Add carrot pieces wherever they look good. This isn't about being precise—it's about making it look intentionally festive. Sprinkle your fresh parsley or chives over the top if you're using them, just before serving. This fresh green garnish makes everything look intentional.
 Pin It
 I remember watching a group of teenagers cautiously approach this skull at a party, expecting it to be weird, and then seeing their entire faces light up as they realized it was just creamy, garlicky, genuinely delicious. One of them asked for the recipe for their own Halloween gathering. That's when I knew this wasn't just a cute appetizer—it was something that brought real joy to people's tables.
How to Make It Your Own
This is one of those recipes that invites creativity. I've done herbed versions where I mixed fresh chives directly into the cream cheese, and I've made a spicy version by adding cayenne pepper and a touch of sriracha to the base. Some friends have used colored cream cheese (beet powder for pink, activated charcoal for black—though that last one is more visual gimmick than flavor). The important thing is keeping that smooth, creamy base so you can shape it easily. Everything else is just decoration and personal preference. Think of the skull as a canvas, not a prescription.
Serving and Storage Tips
This spread is best served within a few hours of assembly, once the cream cheese has firmed up slightly in the chill of your fridge. If you need to make it earlier in the day, keep the vegetables separate and assemble about an hour before guests arrive. Leftover spread (if there's any) keeps in the fridge for three days and is honestly perfect with breakfast crackers or vegetable sticks the next morning. The beauty of this recipe is that it gives you options—it's flexible in timing, adaptable to your dietary needs, and forgiving if you're not a naturally artistic person.
- Chill the platter for ten minutes before serving so the cream cheese holds its shape better
- Keep extra vegetables and crackers nearby so guests can customize their bites
- If something slides, it slides—just nudge it back into place when no one's looking, and no one will ever know
 Pin It
 This recipe reminds me why I love feeding people: because the simplest things, when made with intention and a little bit of fun, become the memories everyone talks about for years afterward. Make this skull, watch people's faces, and know you've done something right.
Recipe FAQs
- → What type of cheese is best for the spread?
Cream cheese softened to room temperature works best for a smooth, creamy texture.
- → Can I make this gluten-free?
Yes, use celery sticks or gluten-free breadsticks for the crossbones to keep it gluten-free.
- → How do I shape the spread into a skull?
Use a spatula to mold the cream cheese mixture into an oval shape on a platter, smoothing the surface before decorating.
- → What vegetables make the features of the skull?
Black olives for eyes, carrot slices for teeth and nose, red bell pepper strips for the mouth, and cucumber rounds for additional decoration.
- → How long can the spread be stored?
Keep it refrigerated and consume within 24-48 hours for best freshness.
- → Any tips for extra flavor?
Adding chopped chives or herbed cream cheese enhances the spread’s flavor.