 Pin It
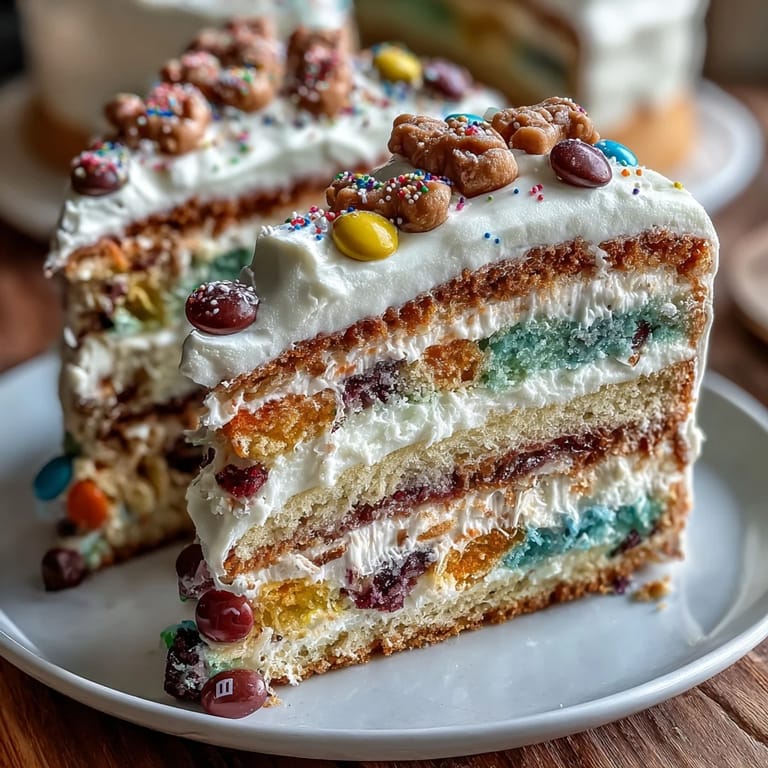
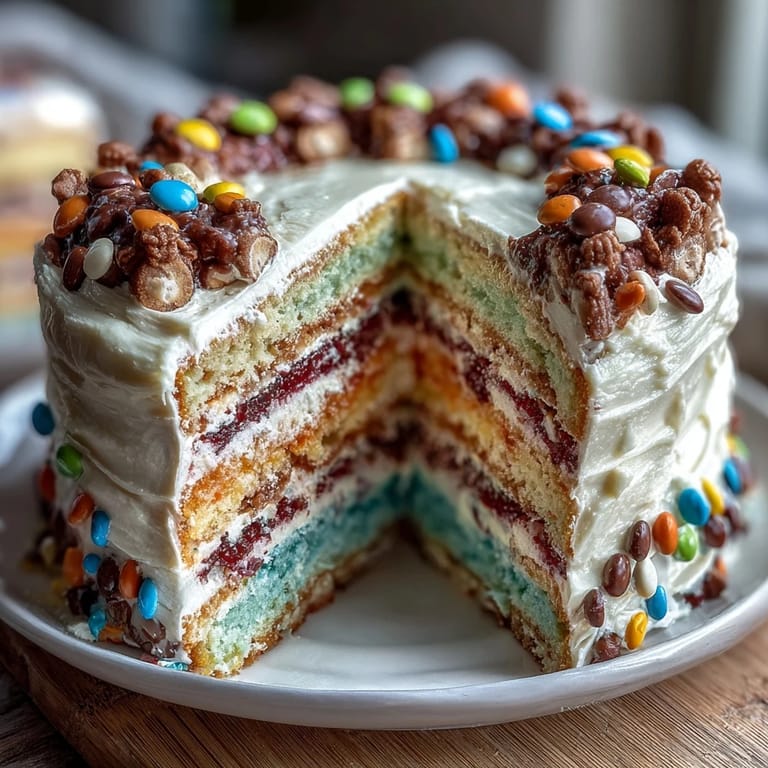
 The first time I made this cake, my hands were shaking as I divided the batter into six bowls and started adding gel coloring—one drop, then another, watching vanilla cake transform into a rainbow that seemed almost too bright to be real. My kitchen smelled like butter and anticipation, and I kept thinking about the moment someone would slice into it and gasp at all those hidden candies tumbling out. It felt less like baking and more like orchestrating a delicious surprise party, one colored layer at a time.
I brought this to a neighborhood block party on a humid afternoon, setting it down on a picnic table in a spot of shade, and watched as kids gathered around the moment I started cutting slices. One little girl's eyes went wide when the candies tumbled out, and she shouted something in Spanish I didn't quite catch, but her joy was unmistakable. That's when I realized this cake wasn't really about me or my baking skills—it was about giving people a reason to celebrate together.
Ingredients
- All-purpose flour (3 cups): The foundation for a tender crumb; sift it with the leavening agents so you don't accidentally pack air out of the batter.
- Baking powder and baking soda (2 ½ tsp and ½ tsp): Together they give you a cake that rises evenly and bakes through without settling.
- Unsalted butter (1 cup for batter, 1 ½ cups for frosting): Room temperature butter creams properly; cold butter won't incorporate air and your cake will be dense.
- Granulated sugar (2 cups): This is what creates that light, fluffy texture when beaten with butter—don't skip the creaming step.
- Eggs (4 large, room temperature): Cold eggs won't blend smoothly and can break the emulsion; set them out an hour before baking.
- Vanilla extract (2 tsp plus 2 tsp for frosting): Real vanilla makes a noticeable difference in flavor depth.
- Whole milk (1 ¼ cups plus ¼ cup for frosting, room temperature): Cold milk can cause the batter to seize; warm it slightly if you forgot to set it out.
- Gel food coloring (red, orange, yellow, green, blue, purple): Gel is more concentrated than liquid food coloring, so you get vibrant color without adding excess water that weakens the batter.
- Powdered sugar (5 cups, sifted): Sifting removes lumps and creates smooth frosting; don't skip this even though it feels fussy.
- Assorted small candies (1 ½ cups): Mini M&Ms, gummy bears, and sprinkles work beautifully; avoid anything sticky or super hard that might break teeth.
Tired of Takeout? 🥡
Get 10 meals you can make faster than delivery arrives. Seriously.
One email. No spam. Unsubscribe anytime.
Instructions
- Set yourself up for success:
- Preheat your oven to 350°F and grease three 8-inch pans with butter or cooking spray, then line the bottoms with parchment paper so the cakes slide out easily. Have all your ingredients measured and at room temperature before you start mixing; this is when patience actually changes the outcome.
- Build your dry foundation:
- In a medium bowl, whisk flour, baking powder, baking soda, and salt together until they're evenly distributed and you can see no streaks of baking soda hiding in the flour. This ensures your cake rises evenly and tastes balanced, not soapy or dense in random spots.
- Cream the butter and sugar:
- Beat softened butter and sugar together for about 3 minutes until it looks pale, fluffy, and almost mousse-like; this is where the cake gets its tender crumb. You're aerating the mixture, which sounds fancy but really just means beating in tiny air bubbles that make the cake light.
- Add eggs one at a time:
- Drop each egg in individually and beat well after each addition so it fully incorporates; rushing this step and dumping all eggs at once can cause the batter to break and separate. Add vanilla after all eggs are in, then beat for another minute until everything looks smooth and creamy.
- Alternate wet and dry ingredients gently:
- Add about a third of the dry mixture, then half the milk, then another third dry, then the rest of the milk, finishing with the last third of dry ingredients. Mix just until combined after each addition—overmixing develops gluten and makes the cake tough, which is the opposite of what you want.
- Divide and tint:
- Divide your batter into six bowls and add gel coloring:
- Start with just a few drops of gel color in each bowl; you can always add more, but you can't take it out. Stir until the color is even and vibrant, letting the batter develop that jewel-tone hue.
- Get the layers into the oven:
- If you only have three pans, you'll bake in batches, which is totally fine—just make sure each batch goes straight into a preheated oven so they rise evenly. Smooth the tops with an offset spatula so they bake level and stack nicely later.
- Bake until golden and set:
- Bake for 15–18 minutes until a toothpick inserted in the center comes out clean and the edges just barely pull away from the pan. Let them cool in the pans for 10 minutes so they set up enough to handle, then turn them out onto wire racks to cool completely—warm cakes are fragile.
- Cut the center cavities:
- Once the layers are completely cool, use a 3-inch round cutter to carefully cut out the centers of four of your six layers, leaving the top and bottom layers whole to contain the surprise. Save the cut-out cake scraps if you want; they're delicious broken up and nibbled on while you assemble.
- Make the frosting:
- Beat softened butter until it's creamy and lighter in color, then gradually add sifted powdered sugar so you don't create a cloud of sugar in your kitchen. Add milk, vanilla, and salt, and beat until the frosting is smooth, fluffy, and spreadable—about 2–3 minutes of beating.
- Stack with care:
- Place your solid bottom layer (the purple one works beautifully as a foundation) on a serving plate, spread a thin layer of frosting on top, then carefully place your first cut-out layer on top. Repeat this with each cut-out layer, frosting gently as you go; these are delicate and they'll crack if you press too hard.
- Fill with magic:
- Once you've stacked all four cut-out layers, carefully pour your assorted candies into the center cavity you've created; listen for the little clinks as they settle into the hidden pocket. Don't overfill or candies will spill out when you place the final top layer.
- Crown your creation:
- Place your final whole cake layer gently on top, centered over the candy-filled cavity, and press down just slightly so it sits securely. Now you have a beautiful secret waiting to be discovered.
- Frost the outside:
- Use an offset spatula to frost the sides and top generously, creating swoops and swirls that feel festive; this is where you can have fun and not worry about perfection. If you want to tint the frosting in different colors for decoration, divide it into bowls and add gel coloring before frosting.
- Chill before slicing:
- Pop the finished cake into the fridge for at least 30 minutes so the frosting firms up and the layers set; this makes slicing cleaner and reveals the rainbow layers more beautifully. Use a sharp, hot knife wiped clean between slices for the neatest presentation.
 Pin It
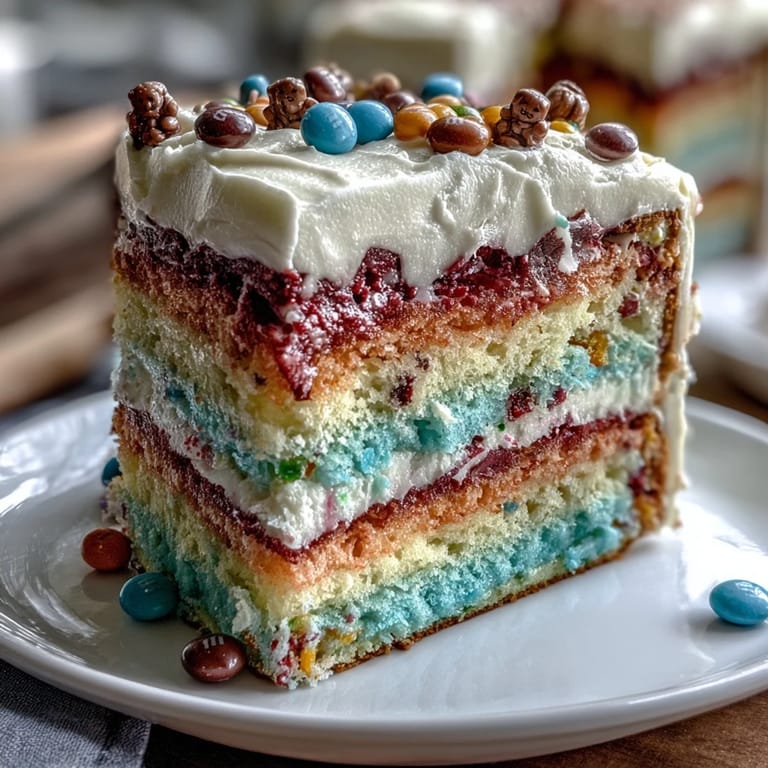
 At a Cinco de Mayo party, I watched my friend Maria's face light up when she saw the layers, then heard her laugh as candies rolled across her plate. She turned to me and said something about how this cake felt like pure joy on a plate, and in that moment I understood that baking isn't really about following steps perfectly—it's about creating moments people remember.
Why This Cake Works for Celebrations
There's something about a cake that surprises you that makes people slow down and actually pay attention to what they're eating instead of rushing through dessert. The rainbow layers catch the light differently depending on where you're standing, and the candies tumbling out give kids and adults alike an excuse to feel excited about food again. Every slice is slightly different because the candies distribute naturally, so even the person getting the last piece feels like they got something special.
Making It Your Own
You don't have to stick to rainbow colors—I've seen versions with just reds and greens for Christmas, pastels for spring, or even just three layers of red, white, and blue for Independence Day. The frosting can be tinted to match whatever theme you're going for, and the piñata filling is completely customizable based on what candies you love or what your guests prefer. The beauty of this cake is that it's a template for celebration, not a rigid rule.
Troubleshooting and Small Victories
If your layers crack slightly when you're removing them from the pans, don't worry—the frosting will cover any imperfections and the taste will be just as good. If you accidentally overbake one layer and it's a bit dry, it'll absorb the frosting beautifully and won't be noticeable when you slice it. If the candies shift when you add the top layer, just tilt the cake gently to redistribute them and laugh at the imperfection, because that's what makes homemade cakes feel real and genuine.
- Use a cake leveler or serrated knife to trim the domed tops of your layers flat so they stack level and the cake doesn't lean.
- If you don't have a 3-inch round cutter, you can use a small drinking glass or even trace around a circular object and cut by hand with a sharp knife.
- Make the frosting the day before if you want—it actually firms up in the fridge and becomes easier to work with, plus it gives you one less thing to juggle on party day.
 Pin It
 This cake is proof that the best dishes are the ones that make people happy before they even take a bite. Make it, watch it surprise everyone, and enjoy the moment when someone you care about realizes there's candy hiding inside.
Recipe FAQs
- → How do I achieve vibrant rainbow cake layers?
Divide the batter evenly and tint each portion with gel food coloring for bright, bold layers that maintain color after baking.
- → What candies work best for the piñata filling?
Small, hard or coated candies like mini M&Ms, sprinkles, and gummy bears work well to stay contained and add texture.
- → Can I prepare this cake in advance?
Yes, chilling the assembled cake for at least 30 minutes before slicing helps set the frosting and eases clean cuts.
- → What is the best way to cut the layers for the piñata effect?
Use a round cutter to remove the center from the middle layers, leaving the top and bottom intact to hold the candy filling.
- → Are there suitable flour alternatives for dietary needs?
Gluten-free flour blends can replace all-purpose flour 1:1 for those avoiding gluten without sacrificing texture.